
Care and maintenance
How to clean a coffee grinder safely
A safe coffee-grinder cleaning routine for electric burr, hand and blade grinders, including what to brush, what may be washed and what must stay dry.
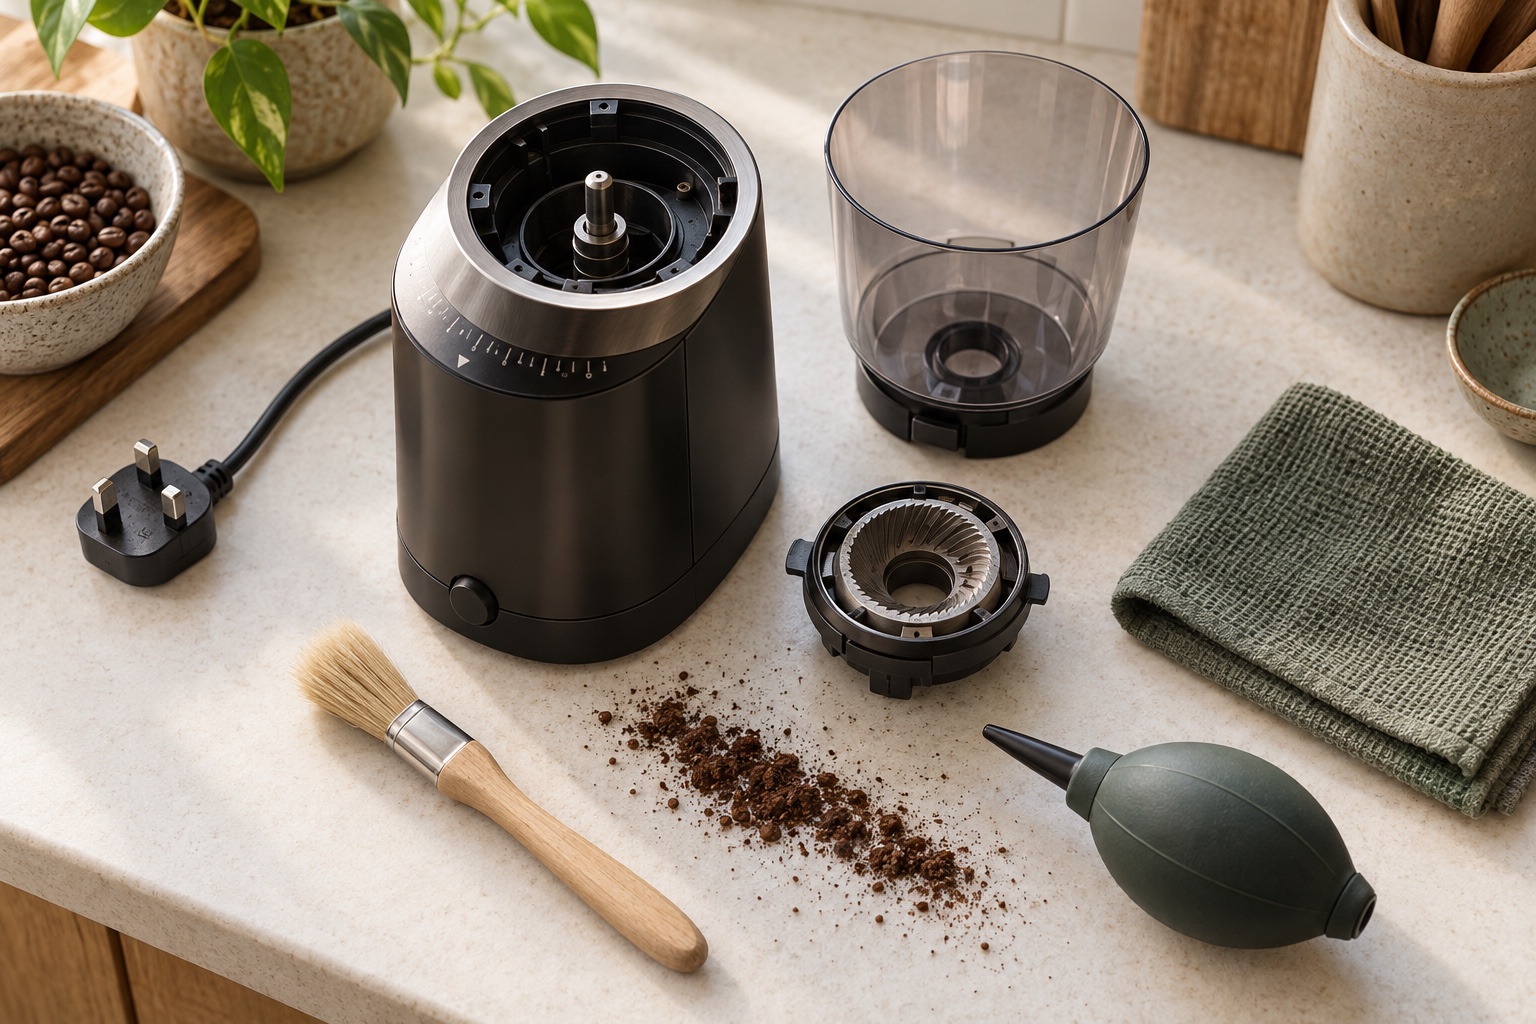
Photograph or record the grind setting before removing an adjustable burr.
Never use water on the motor, electrical parts or metal burr assembly unless the manual expressly says to.
Grinder-cleaning tablets must be approved for the model and used exactly as directed.
Stop and seek service for damaged cables, sparks, burning smells or an obstructed mechanism you cannot safely access.
Coffee dust and oils collect around burrs, chutes, hoppers and grounds cups. A small amount is normal; a neglected build-up can affect aroma, increase mess and make controls stiff. The safe response is regular, modest cleaning—not dismantling the machine further than its maker intends.
This guide gives a general routine. Your grinder’s manual takes priority because burr carriers, calibration tabs, washers and electrical layouts differ. Find the exact model number before starting.
What you need
Use a soft, clean grinder brush or natural-bristle pastry brush reserved for coffee, a dry microfibre cloth and a tray for small removable parts. A hand air blower can move loose dust if used gently. Keep a phone nearby to photograph orientation as parts come off.
Do not start with water, washing-up liquid, a vacuum nozzle pushed into the mechanism, metal picks or compressed workshop air. These can introduce moisture, damage finishes, dislodge components or blow dust deeper into the motor area.
Before cleaning any electric grinder
Switch it off and unplug it from the wall. Let the motor cool if it has just run. Remove beans according to the manual; some hoppers have a gate, while others must be lifted only when empty.
Check the cable, plug and body. Electrical Safety First advises stopping use when an appliance shows damage, sparks or an unusual smell. Cleaning is not a repair for an electrical fault.
Move to a clear, dry surface away from the sink. Keep small springs, washers and screws in order. Record the setting before turning an adjustment collar or removing an upper burr.
Routine clean for an electric burr grinder
1. Empty the hopper
Return clean beans to their sealed bag if they have not mixed with old grounds or debris. Run the grinder only if the manual directs this as the way to clear remaining beans; never put fingers or tools into a moving chamber.
2. Remove user-removable containers
Take off the hopper, lid, grounds bin and portafilter cradle only as the manual permits. These parts often collect oily film and chaff.
3. Lift the upper burr if designed for removal
Many home grinders allow the upper burr carrier to twist out. Note alignment marks and do not force it. If the burr does not release with the documented movement, stop rather than levering it.
4. Brush dry grounds
Brush the upper burr, accessible lower burr surface, chamber rim and chute. Work gently so bristles do not snag. Tip loose coffee onto a tray rather than towards the motor vents.
Mahlkönig’s grinder-cleaner guidance explicitly warns that water cannot be used on burrs and electric motors. Unless your own manual says otherwise, keep this internal work dry.
5. Clean approved washable parts
Wash only hoppers, lids or bins identified as washable. Some plastics are not dishwasher safe. Use mild washing-up liquid if permitted, rinse and dry completely—ideally allowing generous air-drying time—before reassembly.
6. Reassemble and check
Seat the burr carrier exactly as shown, return the adjustment to its recorded point and make sure the hopper locks. Run a small sacrificial dose only if the maker recommends it. Listen for abnormal contact and stop immediately if the burrs scrape unexpectedly.
Cleaning a manual coffee grinder
Empty the grinder and note the setting. Remove the handle, catch cup and burr components in the documented order. Brush coffee from the burr, axle, bearings and adjustment threads.
Steel burrs should generally remain dry unless the manufacturer gives a washing method. Hario and other ceramic-burr designs may permit more parts to be washed, but bearings, metal shafts and wooden components can have different rules. Never assume that “manual” means every part is waterproof.
When reassembling, preserve washers and springs in their original orientation. Turn the handle by hand without beans; it should move freely without grinding metal-on-metal.
Cleaning a blade grinder
Unplug the appliance and brush or wipe loose powder from the chamber. Because the blade is sharp and attached to the motor, do not reach under it with fingers. Use the maker’s cleaning method and keep liquid away from the spindle and motor body.
Some online instructions recommend grinding rice. Ordinary rice can be hard enough to stress a coffee grinder and may leave starch behind. Do not use it unless the manufacturer explicitly approves that exact method. Purpose-made grinder-cleaning tablets are different products and still require model approval.
Can you use grinder-cleaning tablets?
Cleaning tablets or granules are designed to pass through some burr grinders and absorb oils. They can be useful where the manufacturer approves them. They do not replace brushing every accessible surface, and they are not universal.
Check compatibility, dose and follow-up purge instructions. Never substitute food, bread or improvised absorbent material. If the manual prohibits tablets or the burr type is unsuitable, use the documented dry-cleaning route.
How often should you clean a grinder?
There is no single calendar interval. Clean the grounds bin and visible chute as needed, then inspect the burr area more deeply according to use. Dark, oily roasts may leave residue faster; a grinder used for several doses daily needs attention sooner than a travel grinder used monthly.
Use signs rather than anxiety: stale odour, excessive retained grounds, an obstructed chute, new inconsistency or a stiff hopper indicate that cleaning is due. Do not wait for a complete blockage.
What not to do
Do not immerse an electric grinder. Do not spray cleaner into the burr chamber. Do not put wet parts back. Do not use a knife or screwdriver to chip compacted coffee near burrs. Do not run the motor with safety interlocks defeated.
Do not recalibrate burrs by ear unless the official procedure instructs it. Contact between burrs can damage cutting edges. Do not lubricate a food-contact mechanism with household oil.
After cleaning: recalibrate the recipe
Removing and reseating a burr can shift the useful setting slightly. Make the next brew from a recorded starting point, then adjust by flow and taste. Our grind-size guide explains how to make that correction methodically.
If output remains erratic, check that the burr carrier is seated, the hopper is locked and no washer was omitted. Stop if the mechanism sounds wrong. Manufacturer support is safer than repeated trial disassembly.
Frequently asked questions
Can I wash coffee-grinder burrs?
Usually not. Water can cause corrosion and damage an electric mechanism. Wash only parts the exact manufacturer manual identifies as washable.
Can I vacuum a coffee grinder?
Some manufacturers allow careful vacuuming, while others warn against static or component damage. Follow the model instructions and never insert a hard nozzle against burrs or wiring.
Why does my grinder smell rancid?
Old coffee oils may have accumulated in the chute, chamber or bin. Perform the approved dry clean and wash permitted containers. Persistent odour may require manufacturer-approved tablets or service.
Should I clean a new grinder before use?
Read the setup instructions. Wash and dry only the parts identified for first-use cleaning; do not wash burrs or motor components by assumption.
When should I replace burrs?
Follow model guidance rather than a universal kilogram claim. Wear depends on burr material, coffee volume and foreign objects. A declining grind, slower throughput or damage should be assessed with the manufacturer or service agent.
Helpful products
Grinders with documented cleaning routes
These examples have maker instructions or removable user-service parts; always use the manual for the exact model.
ZCG485 / 485-230V-G
- 40 settings
- 40mm steel burrs
- 300g hopper
Best simple filter grinder
Baratza Encore
Best for: filter, pour-over and cafetière without screen or dosing extras
A straightforward hopper grinder with 40 steps and strong UK parts support. It keeps controls simple and puts the budget into a well-established filter-brewing platform.
Why it earns a place
- Straightforward controls
- Replacement parts available
- Compact footprint
What to weigh up
- Not our pick for unpressurised espresso
- No timer or dose display
Skip it if You use a traditional non-pressurised espresso basket; move to the Encore ESP.
Check the official specification →WSFB-100S
- 41 settings
- 58mm flat burrs
- Model WSFB-100S
Best premium filter choice
Wilfa Uniform
Best for: people prioritising pour-over and filter clarity
The 58mm flat burrs, slow motor and automatic stop suit a measured filter routine, with a metal grounds container that avoids some of the static of lightweight plastic bins.
Why it earns a place
- 58mm flat burrs
- Automatic stop
- Five-year domestic warranty
What to weigh up
- Costs much more than entry filter grinders
- Espresso range is not the main reason to buy it
Skip it if Forgiving cafetière coffee is your daily drink; a sound entry grinder already does that job.
Check the official specification →MSS-1DTB
- Ceramic burrs
- Up to two cups
- SKU MSS-1DTB
Best low-cost manual option
Hario Mini Mill PLUS
Best for: one or two filter cups, travel and quiet kitchens
This compact ceramic-burr hand grinder holds enough grounds for roughly two cups and dismantles easily, making it a sensible low-cost start for occasional manual brewing.
Why it earns a place
- Low entry cost
- Quiet and easy to pack
- Official UK stock and spares route
What to weigh up
- Manual effort
- Small 24g-style two-cup capacity
Skip it if You make several back-to-back cups, or limited grip makes hand grinding uncomfortable.
Check the official specification →